When shooting film, I almost exclusively use black and white Ilford HP5+ film. I do not have much experience with other films but the results I am getting with HP5+ are consistent and I am quite happy with the pictures. I am following the advice of trying to keep things as consistent as possible in order to avoid surprises and only change few variables at the time. Today, I am looking in more details at result obtained when pushing HP5+. Ilford HP5+ is rated at 400 ISO, that is a good speed but a bit slow when it comes to indoors and low light situations (which are quite common here in Norway). To cope with that, I am often pushing the film 2 stops and shooting it at 1600 ISO. Again, to avoid too many variables I have not experimented with pushing to many different ISOs but I stick to either 400 ISO (the box speed) whenever possible or choose 1600 ISO when I need to.
What is pushing film?
The principle of pushing film is quite simple: underexpose the negative by a number of stops (in my case two stops) and then increase the development time in order to compensate for it (that is what the term pushing actually refers to). When underexposing the film, it has received less light so if developed normally, the negative would come out very thin, meaning rather transparent or bright. As expected the corresponding positive image would be dark. When developing film, the developer reacts with the silver salts which have been exposed to light and slowly builds little blobs of silver metal around them. The longer the film stays in the developer and the more these grains of silver build up and grow in size. This makes the negative darker and darker and hence the final image brighter and brighter in order to compensate for the initial under-exposure.
Using this technique, in theory any film can be shot at any speed as long as the development time is adjusted accordingly. In practice each film is designed and rated at a specific speed (such as ISO 400 for Ilford HP5+), it corresponds to the best overall performance for the film. Some films will maintain very good performance and image quality for a wide range of ISO and some wont. Ilford HP5+ (as well as Kodak Tri-X) is quite well known for its versatility and ability to maintain good performances when pushed. That is one of the reason I chose it in the first place.
One important thing to note is that the choice of developer also play an important role when pushing film. Some developers with provide better results than others and allow pushing film further than others. There again, I have not tried much but I selected Kodak HC-110 because (i) according to the Ilford development chart it gives good results from 400 ISO to 1600 ISO, (ii) it is a one shot developer, and (iii) it was available and reasonably priced at my local shop. In terms of my development, I always develop at 20°C with HC-110 dilution B (1+31). That gives me a development time of 5 min when shooting at ISO 400 and 11 min when pushing to ISO 1600.
"Side effects" of pushing film?
The drawback of pushing film to a higher speed is a penalty in terms of image quality. Typical effects of pushing film are a higher contrast, more grain and a possible loss of details in the shadows. In practice over the last 2 month I have shot over 20 rolls of HP5+ among which about half were pushed to ISO 1600 due to poor lighting conditions. Based on this experiences, I can kind of confirm that I typically needed to adjust contrast when scanning the images (actually adding more contrast to the images shot at ISO 400) and I can also confirm that I have notices that the grain is more visible when the film is pushed to ISO 1600. However, it is quite hard to quantify so my idea today was to have a little bit more "scientific" look at it.
Looking at the negatives side by side
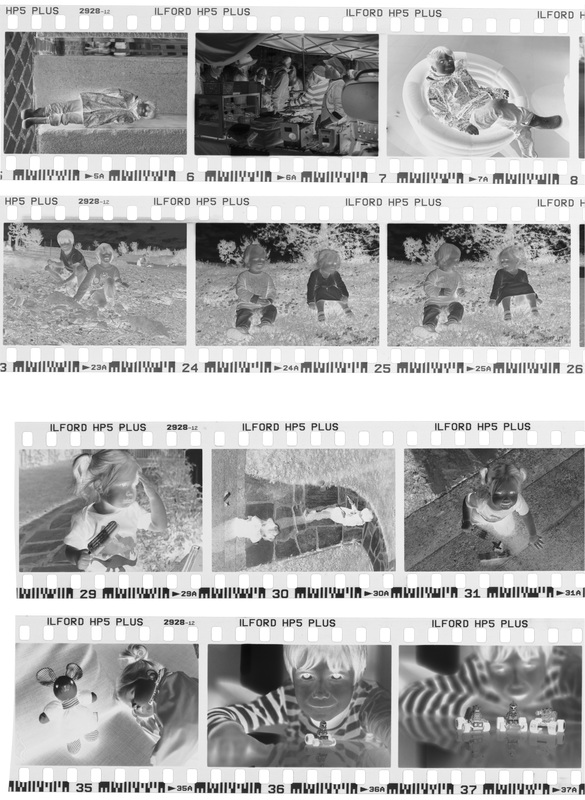
This image bellow is a single photo of 4 strips of negatives from two different rolls. The first 2 stips on the top are from a roll shot and developed at box speed (ISO 400). The two bottom strips are from a roll shot and developed at ISO 1600 (pushed 2 stops).
I specifically chose those two rolls for this comparison because they were shot and developed within a few days of each others, I have used the exact same camera and lenses, the same developer, same agitation techniques, etc. Of course the pictures are not the same, the lighting is not the same, etc. Lets see if I can still learn something.
I specifically chose those two rolls for this comparison because they were shot and developed within a few days of each others, I have used the exact same camera and lenses, the same developer, same agitation techniques, etc. Of course the pictures are not the same, the lighting is not the same, etc. Lets see if I can still learn something.
| To make the photo on the right, I put the negative on the light table and shot them with a macro lens. I shot the image in RAW and I have made no adjustment to the image at all. Only applied the base curve, no sharpening or any other kind of processing. This is to make sure that the tones are comparable across the different strips. The first thing to note is that push processing the film seems to actually have worked. The images on the 2 bottom strips do not seem obviously underexposed as they would if developed for ISO 400. From the images we can see on this contact sheet, there would be no obvious way to tell that the bottom strips were push processed compared to the top strips. A second thing to note is that there is another part of the negative which actually shows very clearly the effect push processing had had. That is the marking on the bottom of the film. These marking are made by exposing the film when it is made and rolled into the 35mm cans. The two films I have used are from the exact same lot of HP5+ and have these marking have been exposed exactly in the same way. We can see on the photo that the marking from the film which was pushed processed have been developed much darker than the one of the film that was developed for ISO 400. Note: How much darker? My image processing software says about 1.5 stops but what it really means so I would no draw any conclusions based on this number. We are processing for 2 stops so for 4 times less light we expect to get comparable tones on the negative but what does comparable means? This might be true for a neutral gray or some mid-tones but things are probably highly non linear when going to highlights or shadows. |
Differences in the contrast?
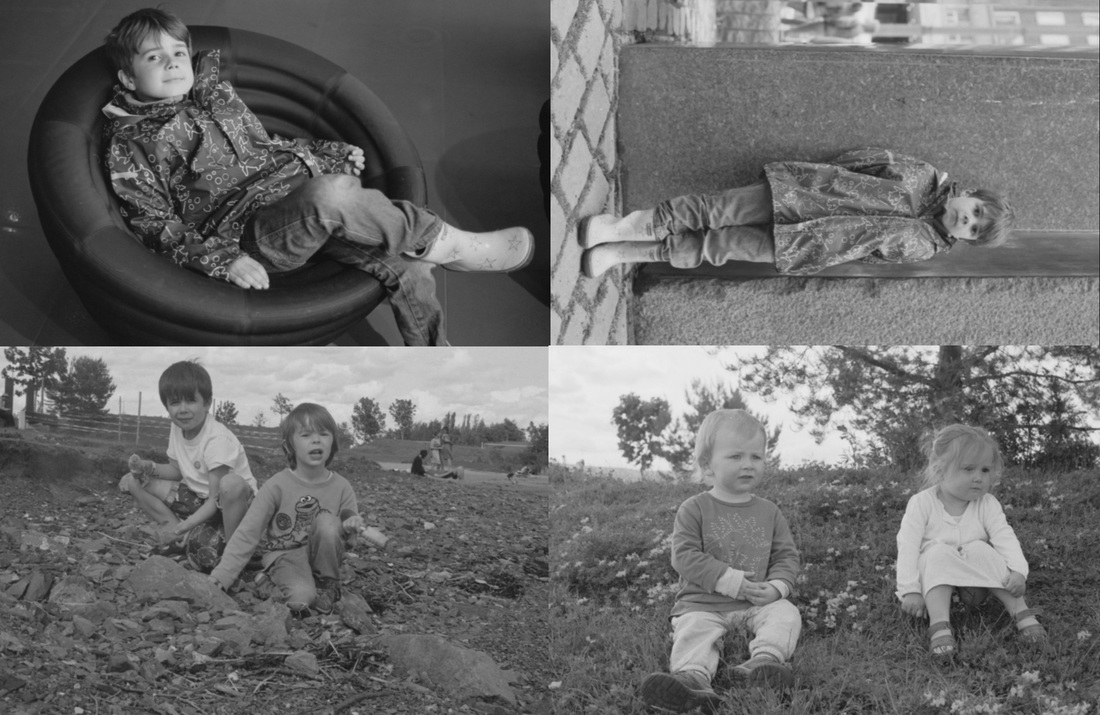
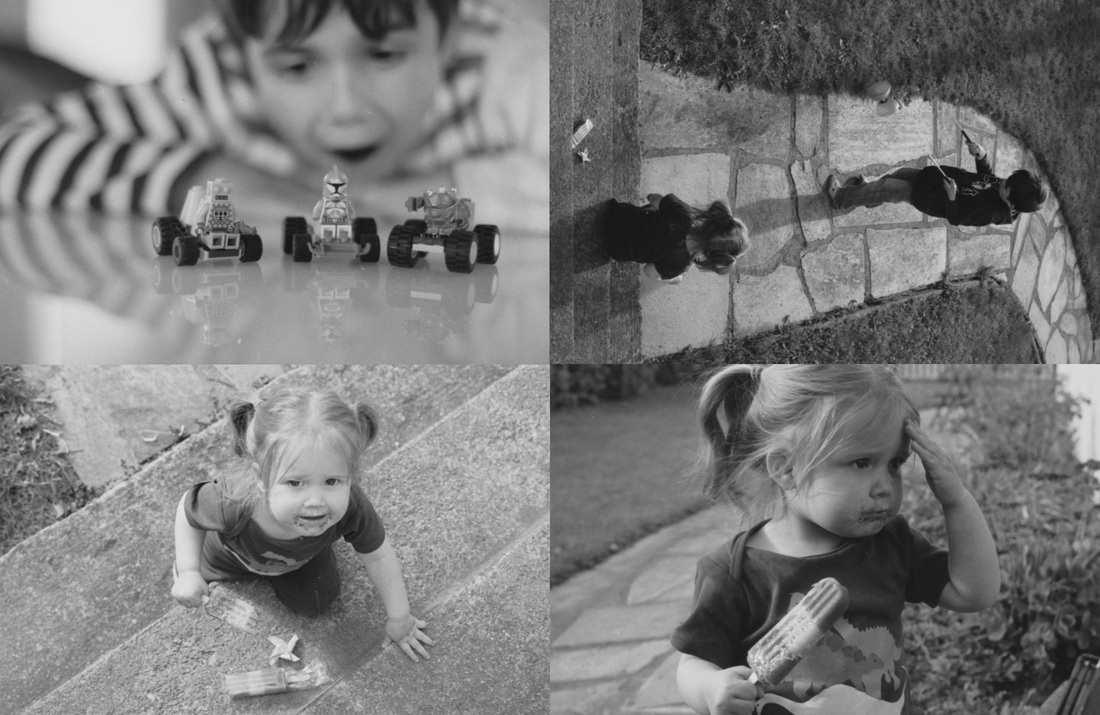
The two images bellow are extracted from the single contact sheet picture discussed in the previous section. All I have done is to copy/past parts of the images in order to make a group of 4 pictures from the negative shot at ISO 400 (on the left) and a group of 4 pictures from the negative pushed to ISO 1600. I have inverted them both but did not apply any curves to them in order to keep them fully comparable.
Of course, here again the pictures and lighting conditions are different so one needs to be careful before drawing conclusions. However, the picture on the right seem to have visibly more contrast than the pictures on the left. Especially the two pictures on the bottom left seem very low in contract despite a scene with a wide dynamic range.
Differences in the grain?
The grain is a bit easier to check: just zoom in until it can be seen. When zooming in 100% in the scanned negatives (which are scanned at 2700dpi), the grain is typically quite visible but comparing the grain on different images is not obvious because at the scanner resolution the individual grains are not resolved and that is actually the point of the scanner to make smooth tones from the grain of the negatives. So instead lets put the negatives under the microscope and zoom in way more!
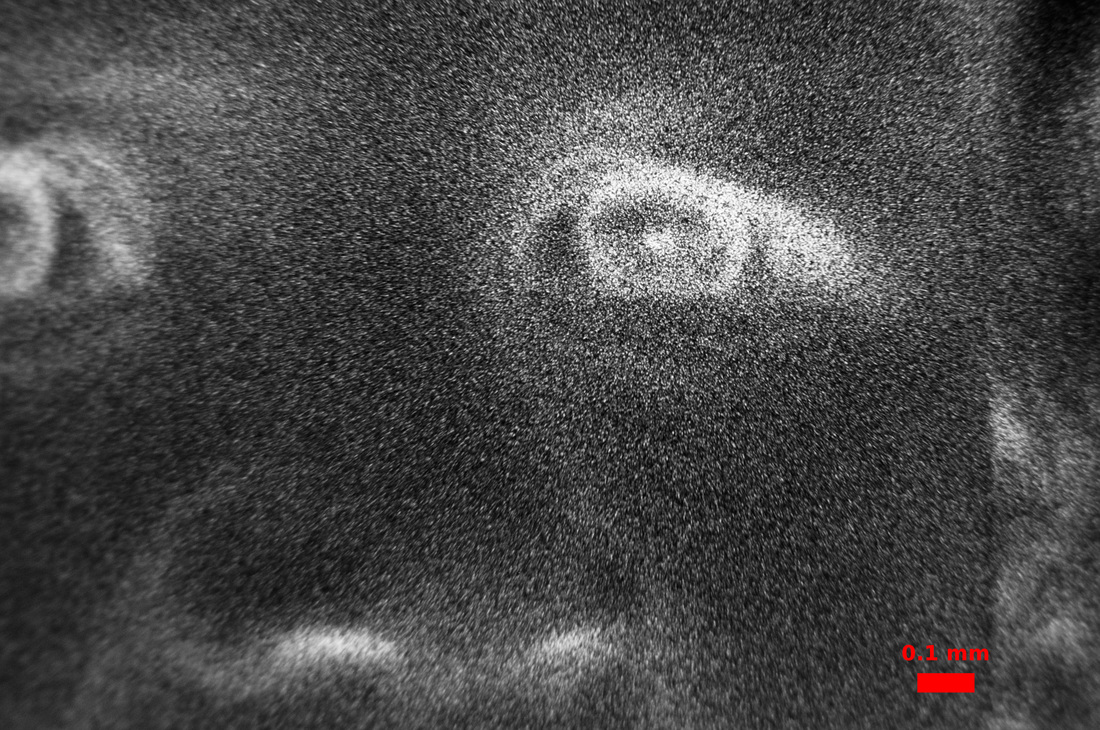
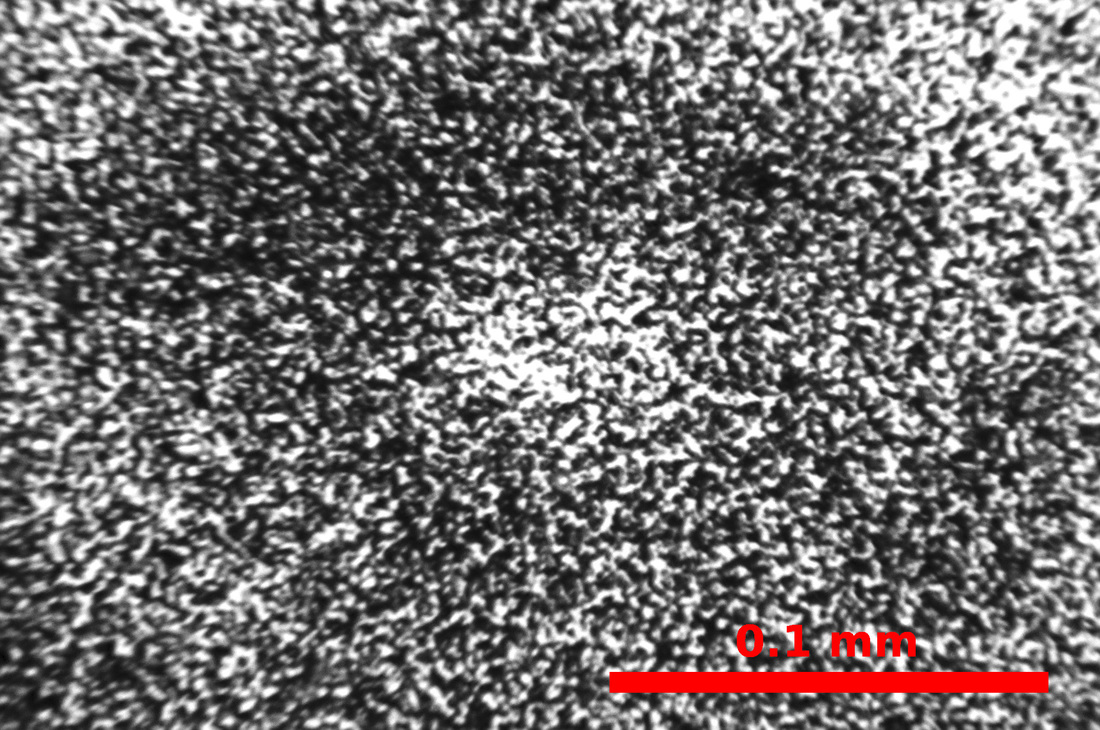
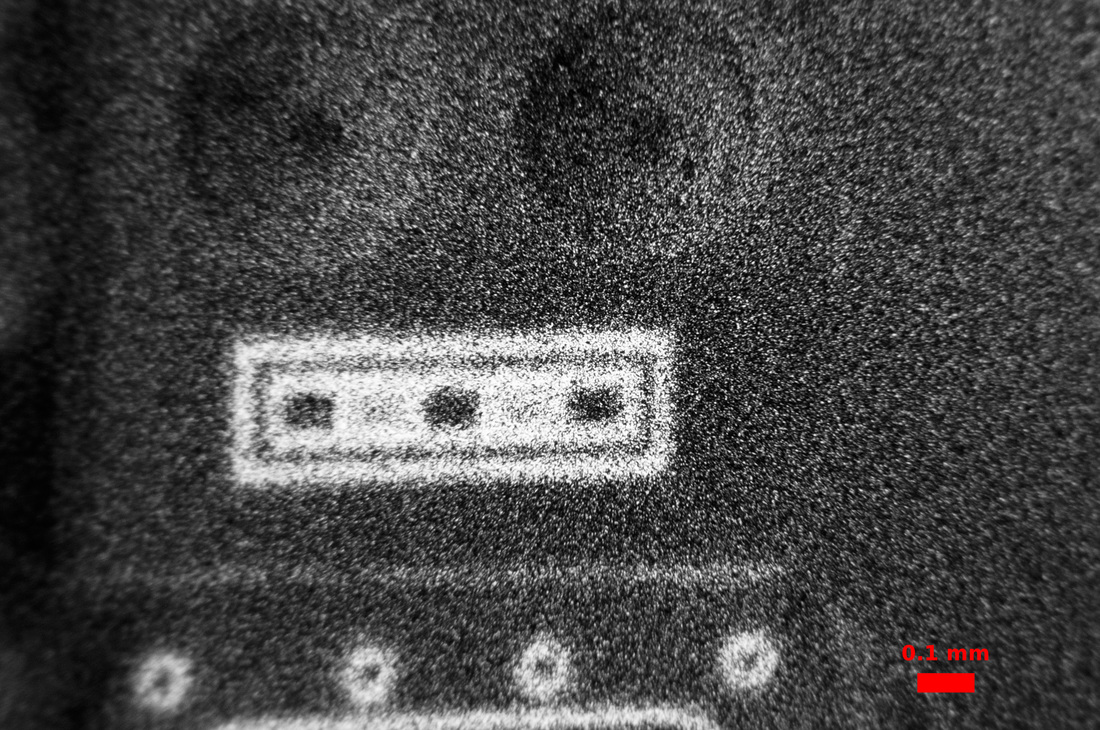
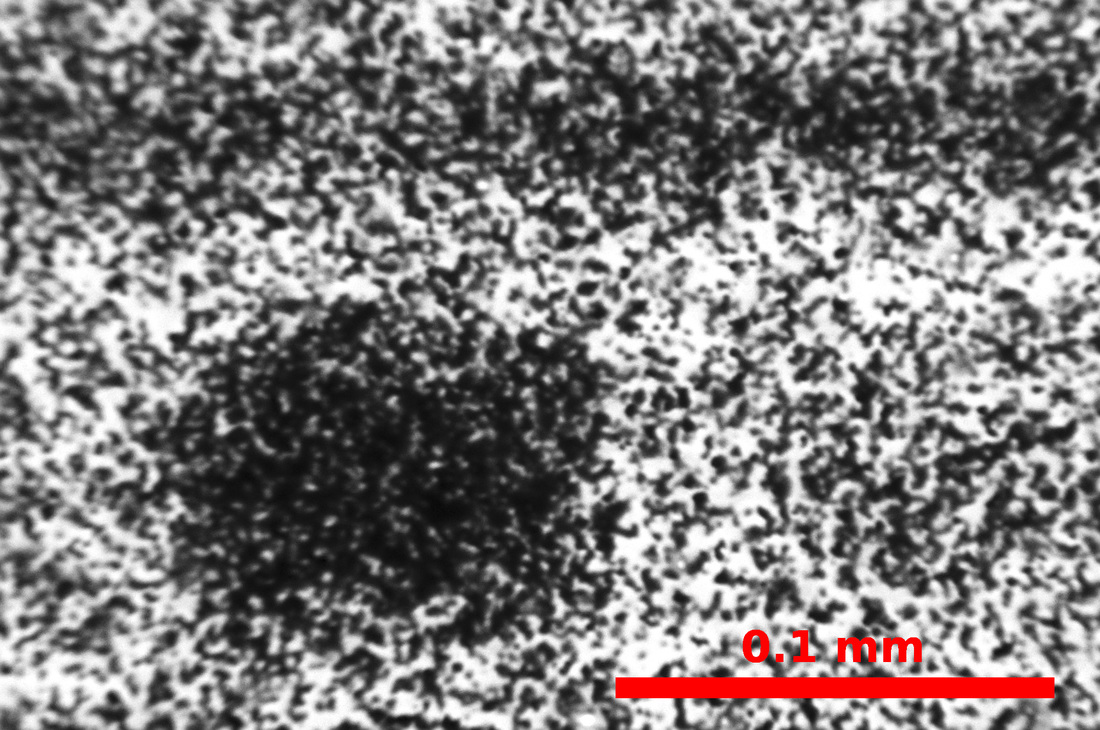
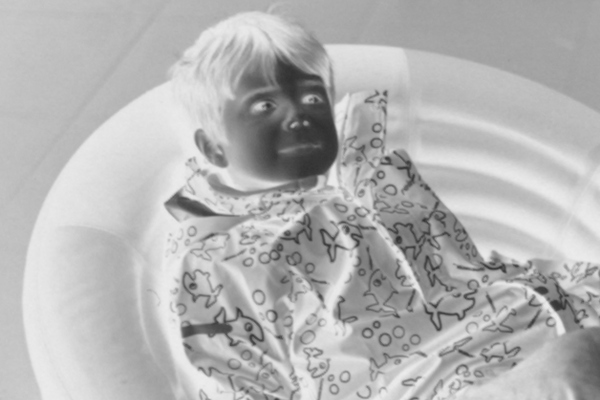
For this test I selected one image from each roll. For the ISO 400 roll, I picked the bottom right image the ISO 400 samples above and zoomed on the face and the left eye of the little guy on the left. For the pushed film I chose the top left image image of the ISO 1600 samples above and zoomed tight on the most left Lego figure. Bellow are the images from the microscope with two different magnifications (I have put the scale in red to give a reference).
For this test I selected one image from each roll. For the ISO 400 roll, I picked the bottom right image the ISO 400 samples above and zoomed on the face and the left eye of the little guy on the left. For the pushed film I chose the top left image image of the ISO 1600 samples above and zoomed tight on the most left Lego figure. Bellow are the images from the microscope with two different magnifications (I have put the scale in red to give a reference).
The first set of image was shot with the microscope 10x lens and I calculated that the digital image I get corresponds to a resolution of about 42,000 dpi (each pixel correspond to about 0.5 microns). The second set of image was shot with a 40x lens which gives me a resolution of about 203,000 dpi (each pixel corresponds to 1,25 microns). That is way more than any scanner can provide (also way more than needed) but it allows to clearly see the grain of the film.
The result shows quite clearly that the film which was pushed to ISO 1600 has coarser grain. That naturally leads to more visible grain on the image. It make sense if we think about the way the film was processed. When the film is underexposed, less silver salts are exposed to light compared to a proper exposure. When increasing the development time, the negative gets darker by growing more silver around the exposed salt so to get the same kind of tone, the underexposed film will grow fewer grain to a larger size compared to a properly exposed film which will grow more grains but each to a smaller size. So in the end, the pushed film will result in a more grainy image.
Differences in shadow details?
This is a quick test to see if we can notice a significant difference in terms of capturing shadow details. I picked two frame which have relatively underexposed zones and bumped the shadow exposure by about 2 stops on the scanned file. Bellow are some crops of the images (to keep things comparable, the crops have the same size and the exact same processing has been applied to the images). We can confirm on those images that more grain is visible for the film which was pushed. In terms of shadow details, we can see that the tones seem smother on the ISO 400 image on the left with quite good details on the back of the chair. On the ISO 1600 image, it seems that the transition to black is less smooth. That is about all we can say given that the images are different.
Conlusion
This is by no mean a rigorous comparison or evaluation of image quality when pushing HP5+. None of the image were shot with this comparison in mind, this is more of a post analysis to see if I can learn something. This has been interesting for me to understand better the processes involved and the results which can be expected when pushing HP5+. My experience before looking at this what that I really likes the look I got when pushing the film to ISO 1600. When shooting at ISO 400 I typically found the images a bit dull and needed to add quite a bit of contrast. I most situations the grain is not bothering me but when trying to enlarge pictures for printing, I sometimes find that the grain was becoming distracting. Since I liked the look of ISO 1600, I was wondering if I should just always shoot at ISO 1600 or if I should continue to bother with ISO 400 whenever possible. The fact is that based on this little investigation, I am now convinced that there is significantly more resolution, more tonal range and probably more dynamic range when shooting at ISO 400 so I will continue to (i) only push film when required, (ii) add contrast to images which are too soft. It is definitely easier to add contrast than to remove contrast!
Let me know if you have any comments or advises!
Let me know if you have any comments or advises!
