| During the summer I shot a good number of rolls of 35mm film both in black and white and in color. I had everything with me to develop the film but nothing to scan it. To get a preview of the images, I bought one of those cheap film scanners which are sold in supermarkets. This article describes my experience with it. The brand of this scanner is "CamLink" but I believe that it is probably sold under various brand names. The intent of these scanner is to provide something quick and easy for people to digitize their old negatives and slides. It does not aim at competing with a proper scanner for any serious user. The way these scanners work is by photographing the negative with a cheap webcam so it is technically not scanning but rather taking a picture of the negative. The great benefit is that it is almost instantaneous. Of course there is a drawback in terms of images quality. Link to the CamLink product page | 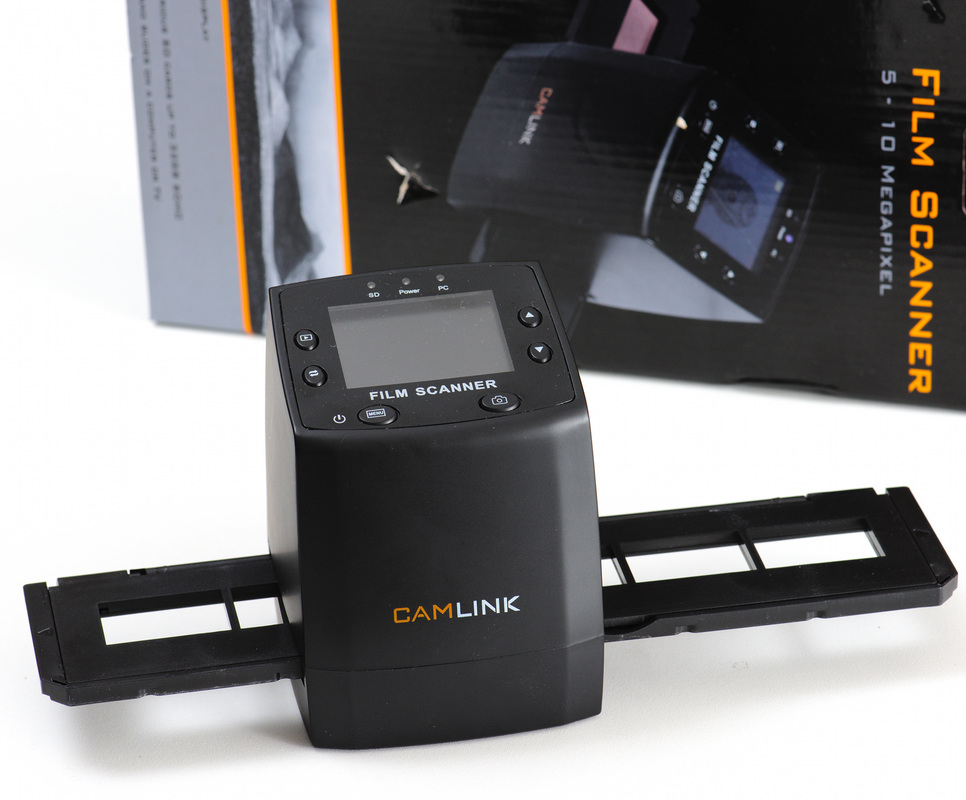 |
I typically scan my film with a Nikon LS-2000 dedicated film scanner which gives very good scans. I did not expect this cheap scanner to provide anything comparable but looking up online I was not really able to find sample images in order to see what kind of images I could expect. That is why I am taking the time to write this up and include some sample so that you can know what to expect.
Looking at the features, my expectations were two fold. First I though I could use it to quickly scan my film in order to have a sort of low resolution contact sheet which I can then use to review the pictures and find the good ones. Second, the scanner has a video output so I thought I would use that to make a slide show for the rest of the family by plunging it in the TV.
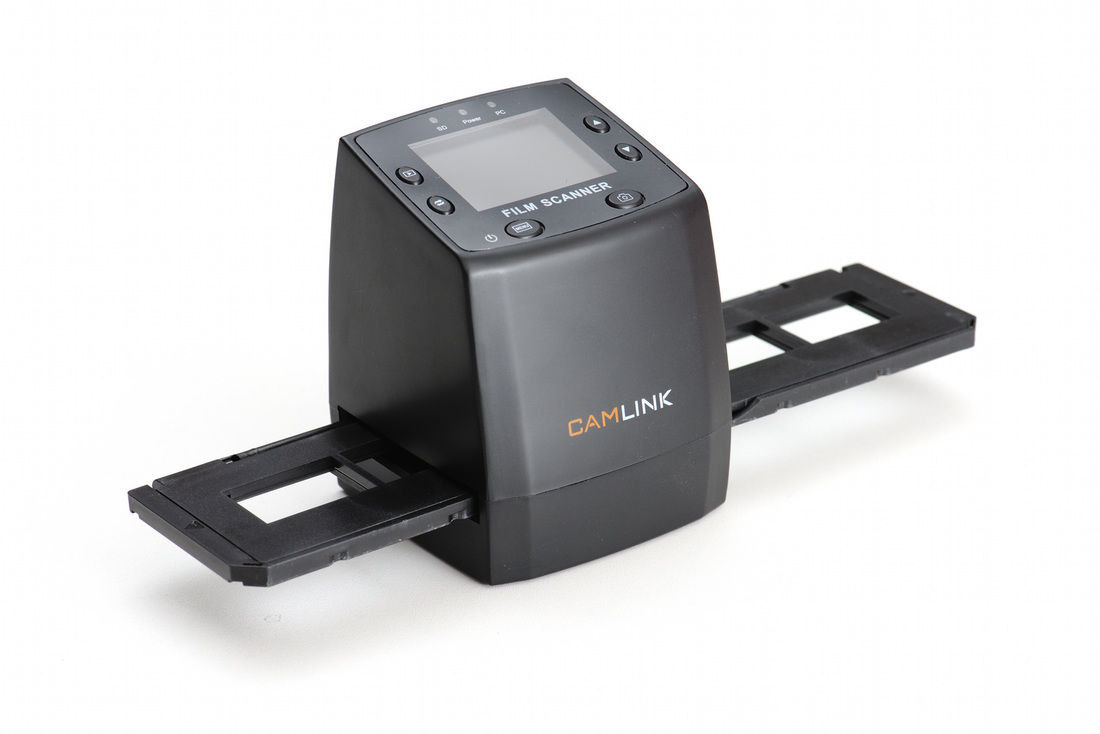
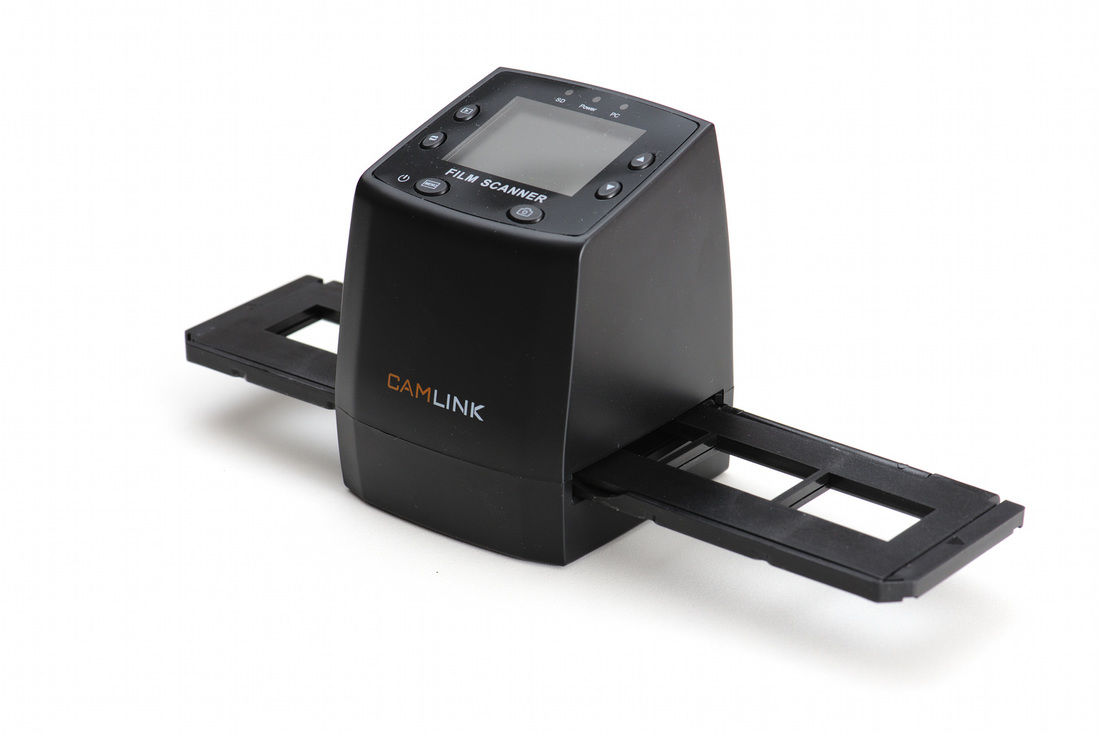
The scanner came with a good set of accessories: the scanner, a couple film holders for 35mm strip and mounted slides, some sort of brush to clean the film (I did not even open it), a power supply, USB cable and video cable. All was well packaged and the overall quality for the hardware was better than I expected. Bellow are a few shots for the scanner. I did not bother to photograph all accessories.
Looking at the features, my expectations were two fold. First I though I could use it to quickly scan my film in order to have a sort of low resolution contact sheet which I can then use to review the pictures and find the good ones. Second, the scanner has a video output so I thought I would use that to make a slide show for the rest of the family by plunging it in the TV.
The scanner came with a good set of accessories: the scanner, a couple film holders for 35mm strip and mounted slides, some sort of brush to clean the film (I did not even open it), a power supply, USB cable and video cable. All was well packaged and the overall quality for the hardware was better than I expected. Bellow are a few shots for the scanner. I did not bother to photograph all accessories.


One nice feature of the scanner is that it allows recording the images directly to an SD card. There is also an option to plug it in the computer but I have not tried, using the SD card is much more convenient. In terms of resolution, it claims 5 or 10 MPix and you can choose if you want 5 or 10 MPix file on the SD card. The actual usable resolution is much much lower, I have no idea what the resolution of the image sensor is and as we will see the resolution which the optics can achieve is probably a limiting factor as well. However, for the purpose I would be happy get a good 1MPix file, resolution is really not the issue here.
Sample images
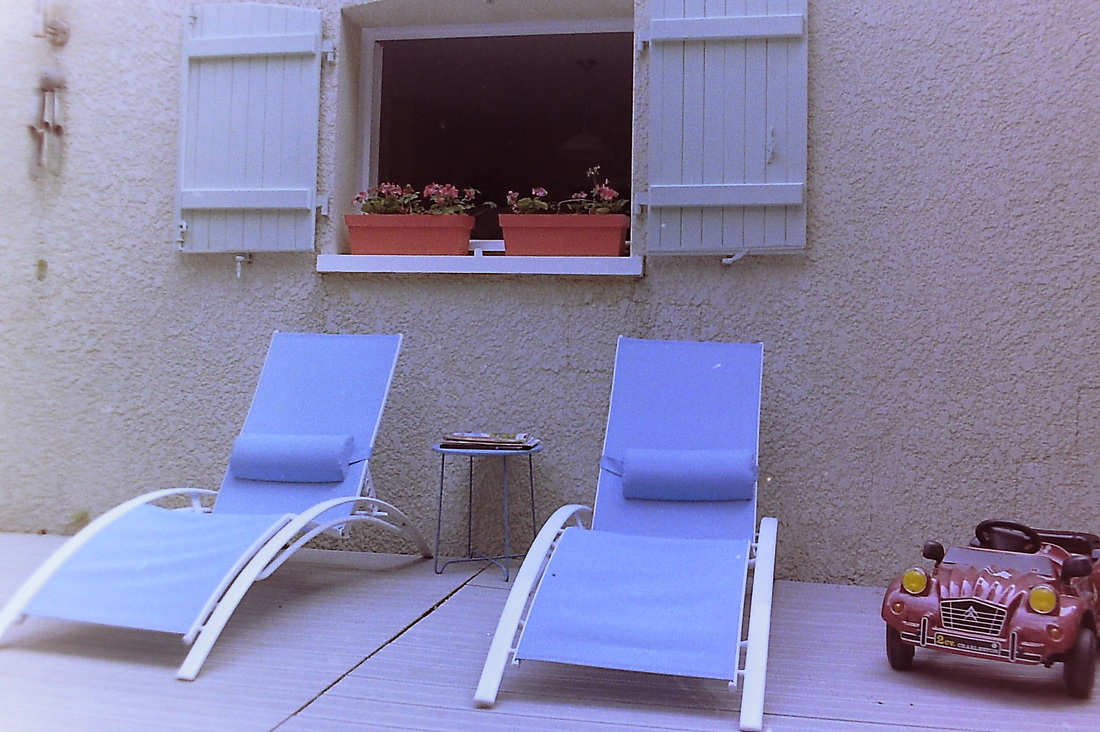
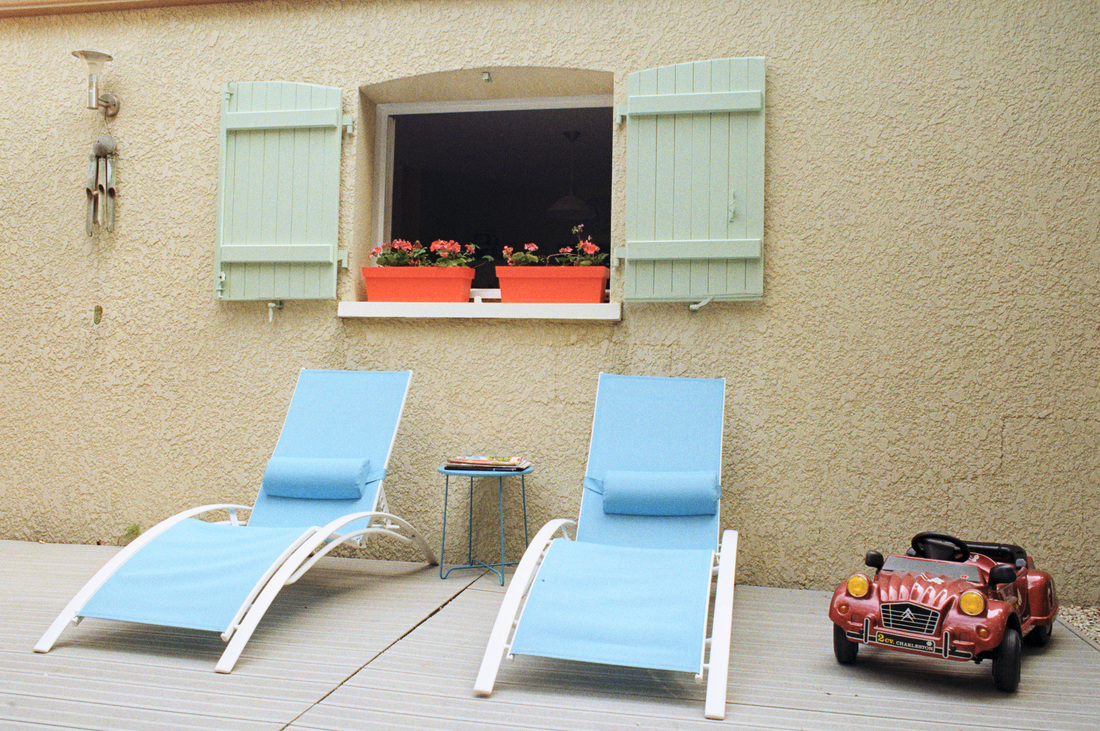
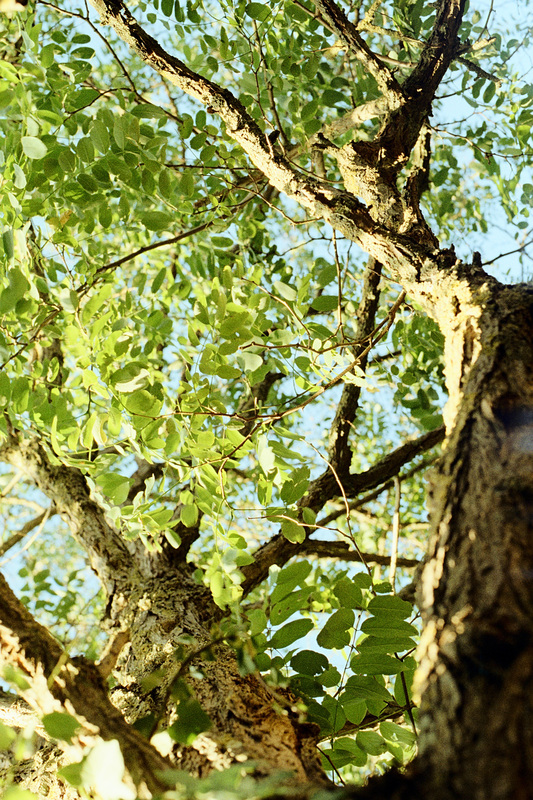
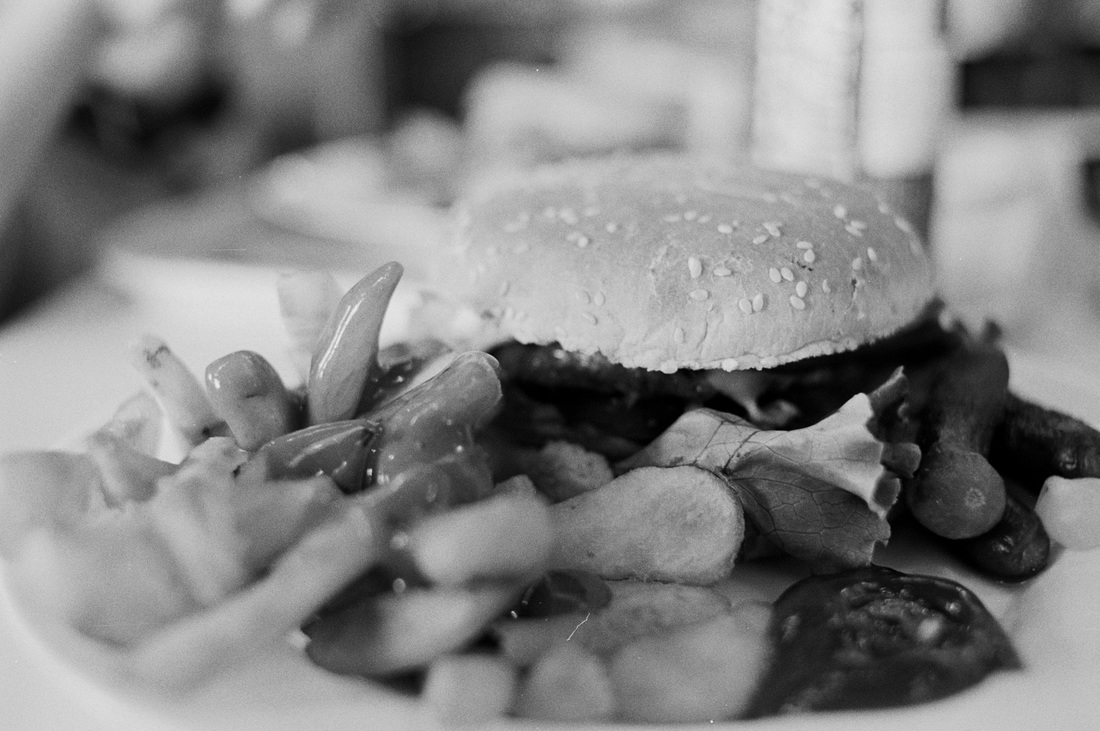
Here is a gallery of color negative scans. These shots are from a Kodak Gold 200 roll. For each images, the first one is the scan from the CamLink Scanner. No post processing has been applied, for each image I have just selected what I thought was the best exposure when scanning. This this the only control the scanner provides: you can make the image brighter or darker based on the preview that you see on the LCD screen. The second images is a scan of the same negative with the Nikon LS-2000 scanner with basic levels adjustments.


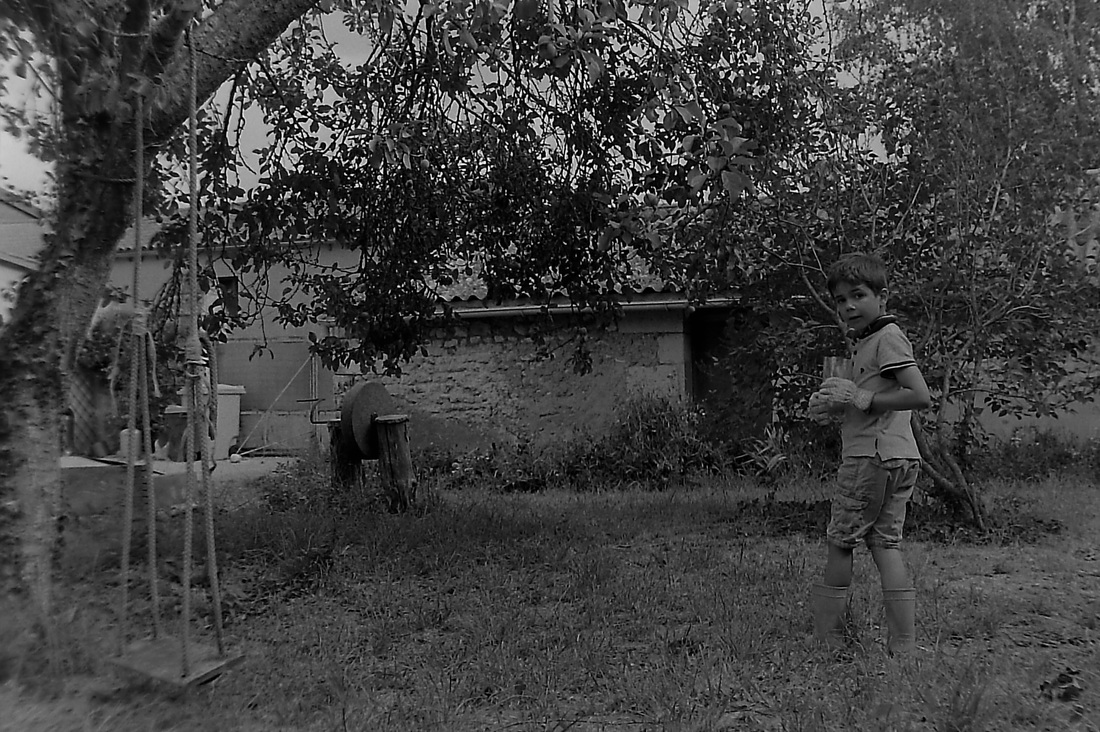
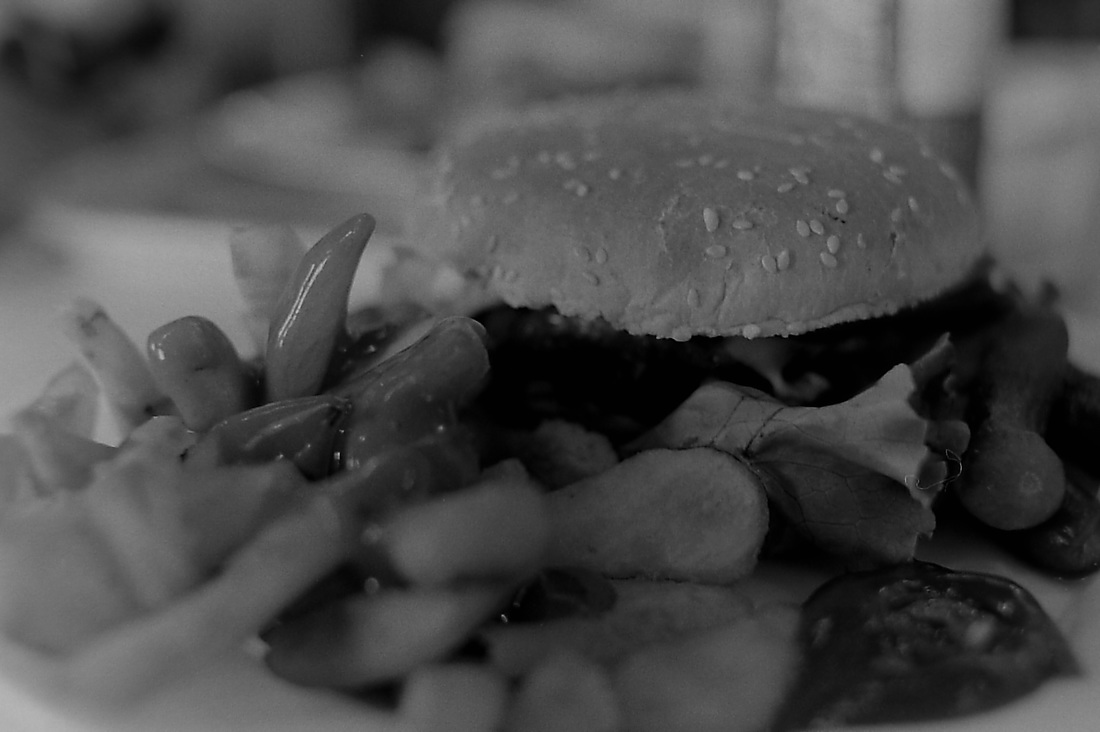
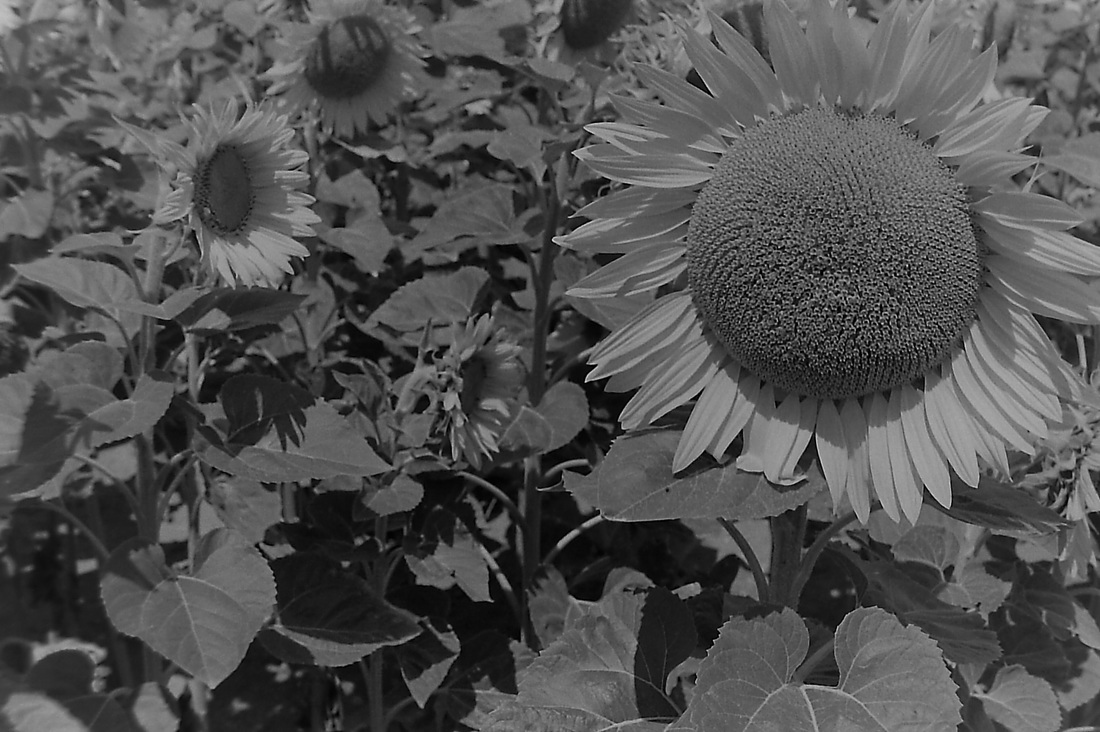
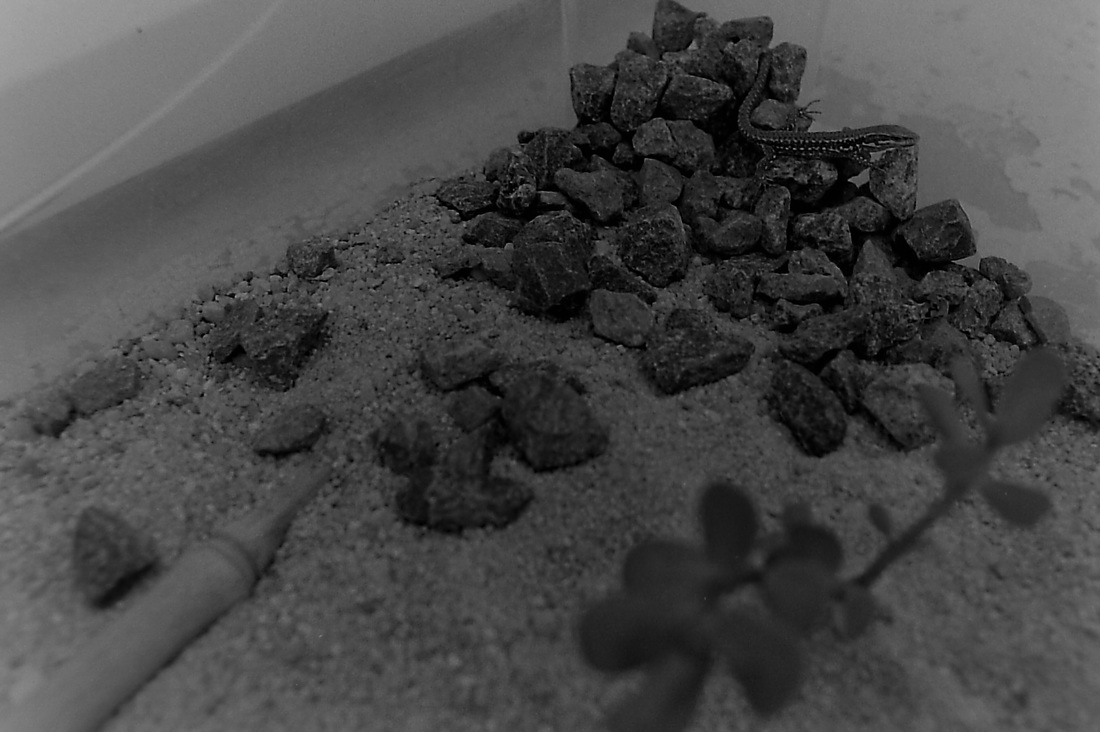
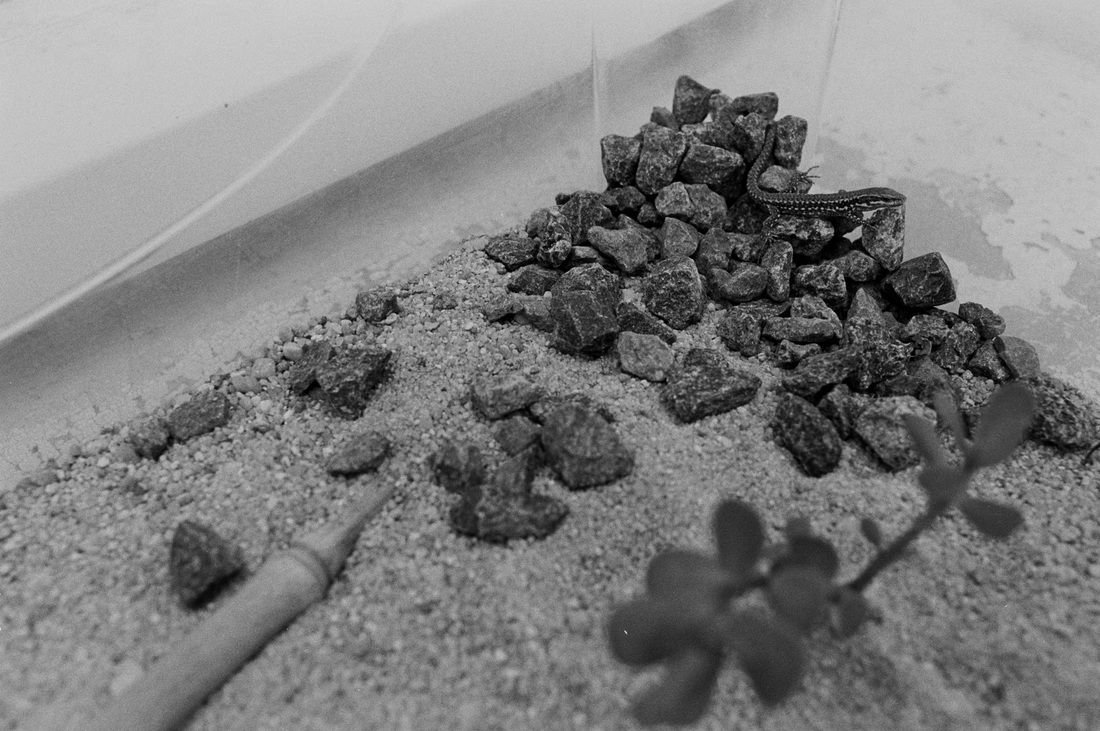
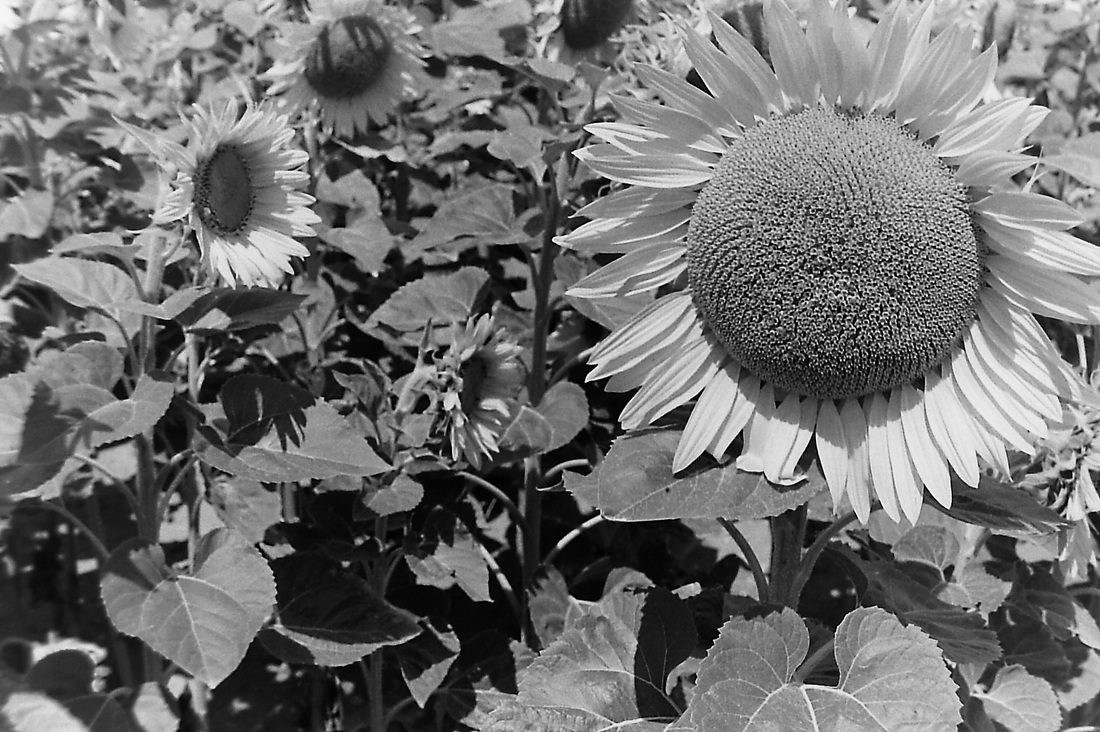
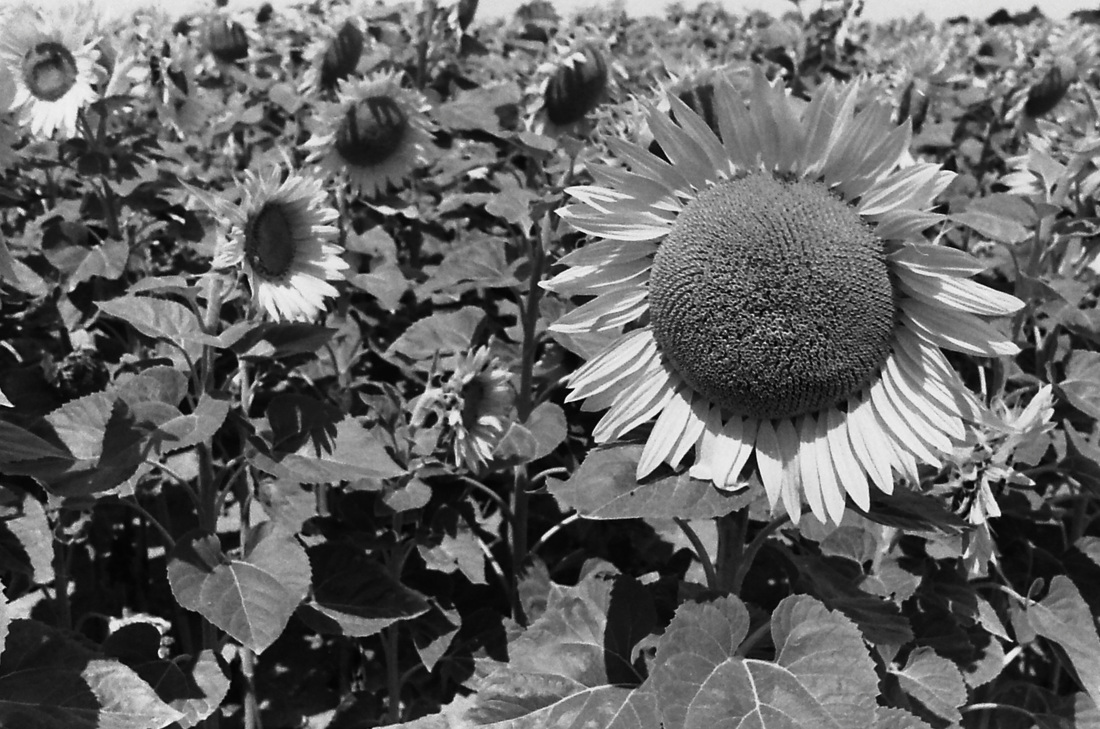
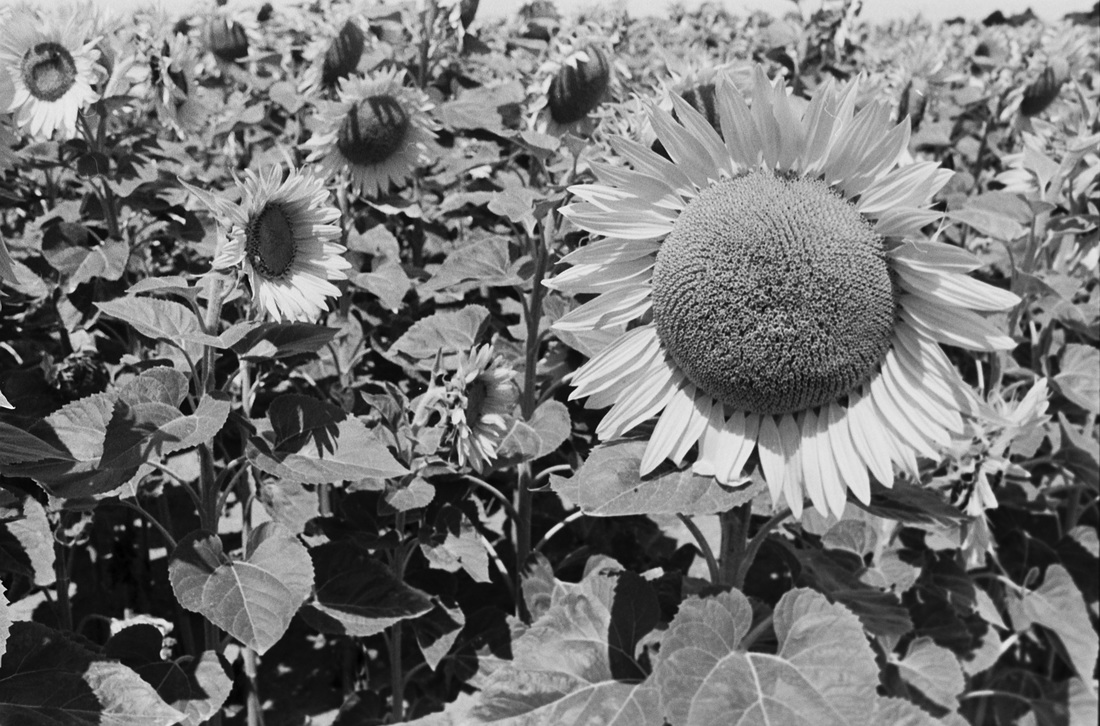
Here is a similar set of images for black and white film. The scanner has a dedicated black and white mode which outputs black and white images. If the scanner is set to color negatives, the black and white images come out with a strong color cast. These shots are from a roll of Ilford HP5+ 400.


| I hope these sample images can show you what you can expect from this kind of scanner. You can use the link on the right to download the full resolution files from the CamLink scanner. These file are about 10 MPix (3888x2588 px) but my impression re-sizing the images is that no details are lost when re-sizing to about 1 MPix (1200x800 px). Anything above that seems to be just interpolation (and some ugly sharpening). |
| ||
Strong points
- Convenience. Being able to scan autonomously to the SD card and almost instantly is really practical. The film is easy to load and when pressing the scan button, it takes only about a second to the scanner to take the picture and save the file. Compare that with mi Nikon LS-2000 which needs a vintage SCSI card, some exotic drivers and software and take about a minute to scan a frame... but of course it is like comparing apples with oranges...
- Build quality. Some parts of the scanner are as cheap as expected (for example the LCD screen and the buttons) but I was suprised by the quality of the negative holders and overal mechanical construction. Do not misunderstand me here, I am not saying that this is very high quality but it is good enough for the job. The negative holders actually feels better than the ones which came with my Epson V600.
- Features. The set of features and controls which are provided is I think very good. There are no advanced controls but there are modes for the different types of film and some form of exposure compensation. This, the SD card and the video output is a nice and simple package.
Weak points
- Cropping. This is horrible, a good part of the 35mm frames is actually missing on the scan and there is nothing you can do to not have it cropped. This is to the point that whenever the subject is not in the center of the from, there is a good chance that at least part of it will be cropped. I guess that given the very poor quality of the optics, the side of the images tuned out to be completely unusable.
- Optical quality. We do not expect anything high resolution from such a scanner but the sharpness, distortion and contrast are really horrible in the corners. And that is after a good part of the edges of the image has been cropped! I would say that the optics is the main issue for this scanner.
- Image quality. The image quality is actually not bad in the center of the frames (for such a scanner). If the entire frame (not cropped!) was captured with the same quality as in the center of the images it would be quite ok. The output file should really be a much smaller file instead of claiming some high MPix.
- Colors. There is no control for the color balance when scanning color negatives. The auto white balance is not very accurate and most of the images come out either with a color cast or with funky looking colors. In the same way there is a bigness adjustment there could be at list a white balance adjustment when scanning.
- Video output. The video output is very low resolution but more annoying, whenever it is connected, the LCD screen turns off and the video shows all the controls for the scanner on the video as overlays over the images. It hides a significant part of the images and really does not allow viewing/sharing the images.
How much is it really cropping out?
| The cropping issue has really bothered me from the very first roll I "scanned". To better quantify, I took a picture of the negative for one of the sample images in order to measure just how much is cropped out. I photographed the negative with my DSLR by putting it on the light table and then added the green and red coloring to show what part of the negative was captured and cropped by the CamLink scanner. This confirms what I expected, a quite large band is cropped all around the frame. Measuring it, the greed area only represents 67.5% of the frame, that means that 1/3 of the image is just cropped away. Now I understand what whenever my subject was not in the center it was cropped :-) This is really awful and make this scanner pretty much useless. | 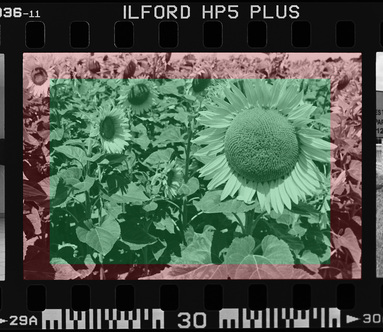 |
Is there a better alternative?
This kind of webcam-based "scanners" are not an alternative for a proper scanner but there are other strategies for photographing the negative from using a mobile phone camera to a DSLR. How does it compares? The 3 images bellow are the one from the CamLink Scanner on the left, from my mobile phone in the middle (it is a Samsung Galaxy S3) and from my DSLR on the right (Nikon D600). I did nothing fancy here, simple put the negative on a light table (an old LCD screen I modified as a light table) and hand held a shot of the negative. There is a lot of room for improvement if a tripod or some sort of support it used. I have applied levels on all 3 images to make them more comparable.
Of course the DSLR is a clear winner here. Add a proper jig, a good marco lens and a tripod and it is probably possible to reach the image quality of a scanner. The mobile phone is the real alternative, the image quality is not going to be on par with the DSLR or with a scanner but I believe it can easily surpass something like the the CamLink scanner. Most mobile phone have better optics, better senrors and better software than one of those cheap webcam based scanner. I have yet to search for existing apps and jigs to scan negatives with android but I am pretty sure there must be some exiting stuff.
Conclusion
I have been disappointed with this scanner. It is not really usable for any of the two "use cases" I had for it. For previewing the images and finding the good ones, the large amount of cropping and the poor image quality on the edges of the frame make it hard to even see if an image is sharp or not or if the composition came out right. It is easier to see it by just looking at the negative... For the second use to share images on the TV, the primary problem is that there is no option to just show the image without all the controls, icons and other user interface overplayed on the image. Another limitation is the very low resolution of the video.
Leave me your comments bellow if you have had different experiences or if you have any questions.
Leave me your comments bellow if you have had different experiences or if you have any questions.